
How to Fix Christmas Lights
A dark strand or an unlit tree section? Start with a few simple checks, then follow the repair steps for your lighting problem.
Before handling lights: Unplug the tree or strand and let bulbs cool. Disconnect power again before every bulb change, fuse replacement, or connection check.
Start with these three checks
Work in order. A loose connection or blown fuse can look like a much bigger problem.
Power & connections
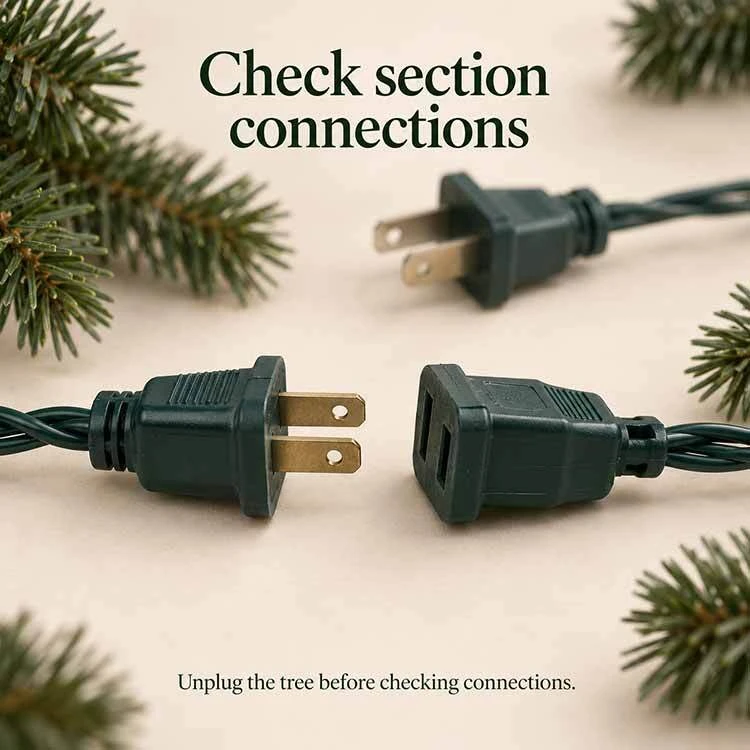
Test the wall outlet with a lamp. Check the tree’s power switch and timer. With the tree unplugged, check its section connections using the assembly guide. Keep the original power adapter or controller connected.
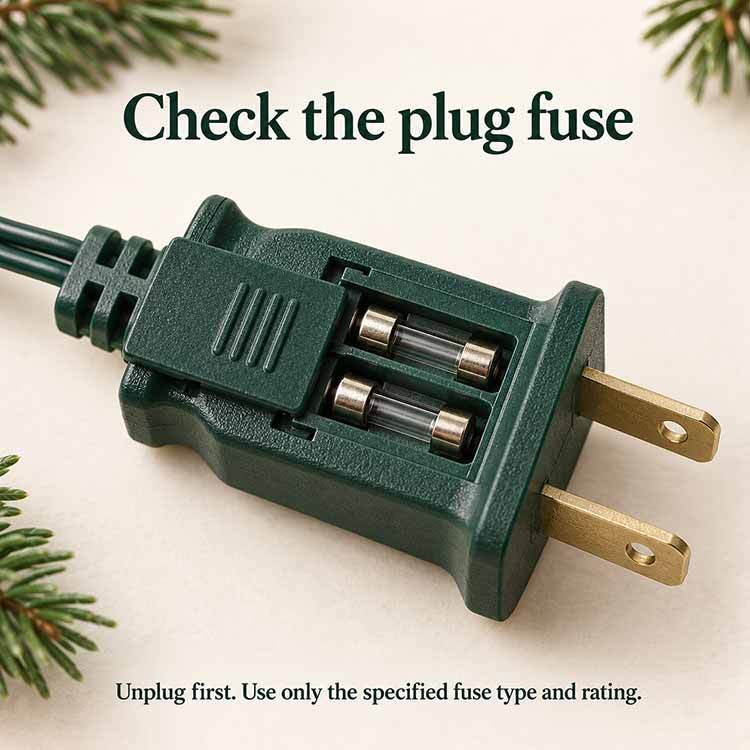
The plug fuse
If the plug has a replaceable fuse, follow the light set’s instructions to check it while unplugged. Replace a blown fuse only with the specified type and rating. If it blows again, stop using the set.
Loose or missing bulbs
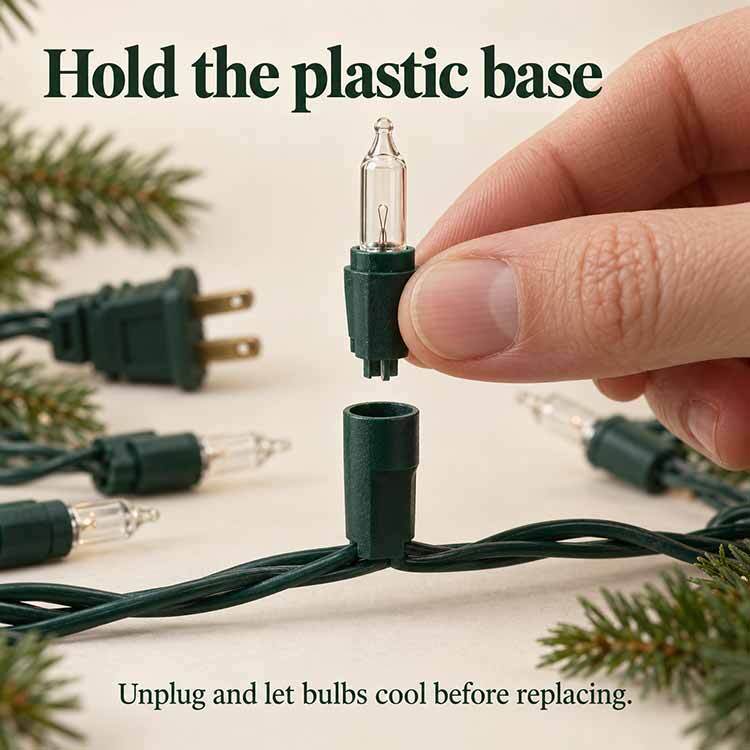
On sets with replaceable bulbs, look for loose, missing, or broken bulbs. Gently reseat loose bulbs and replace damaged ones with the exact specified type. Never force a sealed bulb out of its socket.
Check your light type: The bulb-by-bulb methods below are for traditional incandescent mini lights with removable bulbs. For LED, sealed-bulb, or color-changing systems, start with the power and connection checks, then follow your model’s instructions or contact Treetime.
Jump to a section
What’s happening with your lights?
Select the problem that matches what you see.
The entire strand is dark
Start with power and the plug fuse. A loose connection, blown fuse, or interruption at one bulb can leave the strand dark. Complete the three checks above before replacing bulbs.
If power and the fuse are good on an incandescent mini-light set, use a verified working bulb to check the affected series.
Follow the bad-bulb testing stepsOne section of my pre-lit tree is dark
Check the connection feeding that section. Unplug the tree, then check the section plugs or trunk connections exactly as shown in your model’s assembly instructions. Do not force connectors or bypass an adapter or controller.
If the section stays dark, the problem may be in its light strand or power connection. For sealed bulbs, LED systems, or a tree that may be under warranty, contact customer care before taking anything apart.
View the assembly guideA few bulbs are out, but the rest stay lit
Replace the failed bulbs promptly. On incandescent mini lights, a bulb’s internal shunt may keep the rest of the series lit after its filament burns out. Leaving failed bulbs in place can shorten the life of the remaining bulbs.
Unplug the set, let it cool, and use replacements that match the required bulb specifications and base. For nonreplaceable bulbs, follow your model’s care instructions.
Learn how the bulb’s shunt worksSome bulbs look unusually bright
Unplug the lights. In an incandescent series, failed bulbs or incorrect replacements can put extra voltage across the remaining working bulbs. Replace burned-out bulbs with the correct type before testing again.
Understand cascading outagesMany bulbs are blackened and the section is out
The incandescent series may have had a cascading outage. When multiple bulbs fail together, replacing all bulbs in the affected series can be more practical than searching for one bad bulb.
If the sockets or wiring also show damage, leave the set unplugged and get help instead of re-bulbing it.
See how to re-bulb the affected seriesThe strand flickers when it moves
Unplug it before inspecting. A loose bulb, damaged bulb lead, socket problem, or wiring damage may be interrupting the connection. On replaceable-bulb sets, gently reseat loose bulbs while unplugged.
If flickering continues, or you find a cracked socket, frayed wire, or exposed conductor, stop using the affected lights. Do not keep moving a powered strand to find the fault.
Know when to stop troubleshootingSee the repair process
Watch Treetime’s light repair video, then use the written steps below as you work.
Open video on YouTubeFind a bad bulb with the Leapfrog technique
This method checks an incandescent mini-light series one socket at a time. Start after you have confirmed power, checked the plug fuse, and reseated any loose bulbs.
- Unplug the lights and find your starting point. Let the bulbs cool. Follow the wire to the first socket in the affected series and mark it so you can work in order.
- Swap in the verified working bulb. Remove the existing bulb by its plastic base, not the glass. Check the replacement’s small wire leads are positioned correctly around its base, then seat it securely without forcing it.
- Reconnect power briefly to check the result. Make sure every socket has a bulb and the plug’s fuse cover is closed before testing. Keep hands clear of bulbs, sockets, and wiring while powered.
- If the section lights, you have found a problem area. The removed bulb or its seating may have interrupted the circuit. Unplug again before replacing any other bulbs that remain dark.
- If it stays dark, unplug before the next swap. Test the removed bulb with a compatible bulb tester. If it is good, return it to its original socket and move the verified working bulb to the next socket. If it is bad, leave the good replacement in place and use another verified working bulb for the next socket.
- Repeat in order. Always unplug between changes. More than one bulb may have failed. If every bulb checks out and the series still will not light, stop and contact customer care.
How to re-bulb a strand
If an incandescent series has many burned-out or blackened bulbs, replacing all bulbs in that affected series may be the practical repair. A longer light strand can contain more than one series, so identify the affected group before you begin.
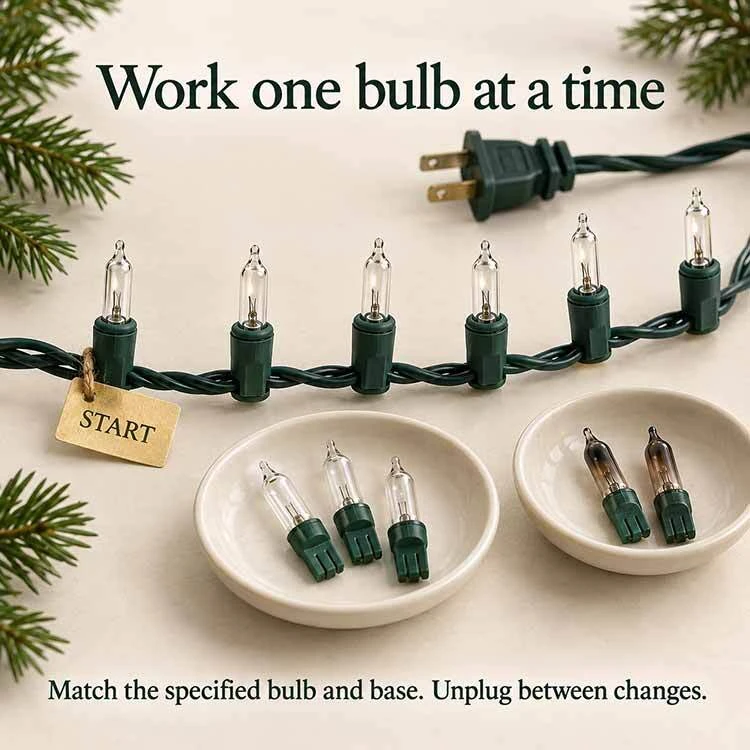
- Unplug the tree or light strand. Let it cool and leave it disconnected until all replacements are installed.
- Identify the affected series. Use the light set’s instructions to locate the group you are replacing. Mark the starting socket. If you cannot identify the correct group, ask customer care before proceeding.
- Replace one bulb at a time. Pull gently from the plastic base. Release any retaining clip as directed; do not pull on the glass or the wires.
- Check and seat each replacement. Make sure the bulb leads are correctly positioned around the base and the bulb sits securely in the socket.
- Finish the entire affected series. Continue in order, checking that no socket is left empty.
- Reconnect power and test. If the section remains dark, flickers, or a fuse blows again, unplug it and contact customer care.
Why one bulb can affect a whole section
Traditional incandescent mini lights are arranged in series groups: electricity follows a path through the bulbs and sockets. Many bulbs include a shunt, a small bypass that can keep electricity moving after the filament burns out. That is why one bulb may go dark while the others stay lit.
A missing or loose bulb, damaged bulb lead, poor socket connection, or failed shunt can still interrupt that path. A dark section does not automatically mean the entire strand needs replacing. LED and sealed lighting systems can behave differently, so use the instructions for your model.
What is a cascading light outage?
In an incandescent series, shunts can keep current flowing around burned-out filaments. That leaves more voltage across the remaining working bulbs. As additional bulbs fail, the extra strain can lead to a larger group burning out, sometimes with dark or blackened glass.
When to stop troubleshooting
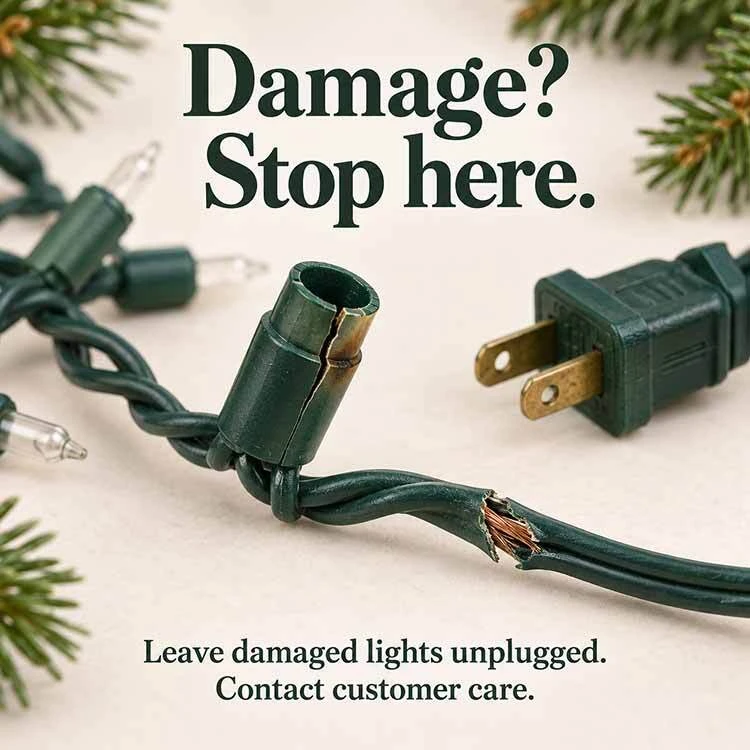
Stop using the lights if you find frayed or exposed wires, cracked or melted sockets, scorch marks, or a fuse that blows again after replacement. Do not splice wires, bypass a fuse, or force a connection.
If power, connections, fuses, and the correct replacement bulbs check out but the section is still dark, the fault may be beyond a simple bulb repair. Review Treetime’s warranty information or contact customer care for the next step.
If you use an additional strand temporarily, keep the faulty lights disconnected. Use an appropriately rated replacement set according to its instructions and the tree’s instructions.
Christmas light repair FAQs
Can I use these repair steps on LED lights?
Start with the outlet, power switch, original adapter or controller, and section connections. The Leapfrog and re-bulbing methods here are for incandescent mini lights with removable bulbs. Only replace LED bulbs if your model allows it, using the manufacturer’s specified replacements. Do not force sealed bulbs out.
Why did one burned-out bulb lead to more failures?
In an incandescent series, a shunt can bypass a burned-out filament, leaving more voltage across the bulbs that still work. As more bulbs fail, the strain can increase. Replacing failed bulbs promptly with the correct type helps prevent a larger outage.
Should I replace every bulb or look for one bad bulb?
Complete the power, fuse, and loose-bulb checks first. For an isolated incandescent bulb problem, use the Leapfrog technique. If many bulbs in the affected series have burned out or blackened, re-bulbing that series may be more practical. If the wiring or sockets are damaged, stop using the lights.
What should I check first on a pre-lit Christmas tree?
Check the wall outlet and the tree’s power switch. Then, with the tree unplugged, check its section connections and any user-replaceable fuse according to your model’s instructions. Inspect removable bulbs for loose seating. If a full section remains dark and the tree may be under warranty, contact customer care before taking it apart.
Can I store the tree with a lighting problem?
Address the issue before storage when possible. If it is unresolved, label the affected section and take a photo so you can find it next season. Keep damaged lighting disconnected and arrange repair or replacement before using it again. Follow the tree storage guide when packing the tree away.
Still have a dark section?
Let Treetime help you find the next step. Have your order number, tree model, and photos of the affected section handy, along with the checks you have already tried.